form


 <br />


 <br />
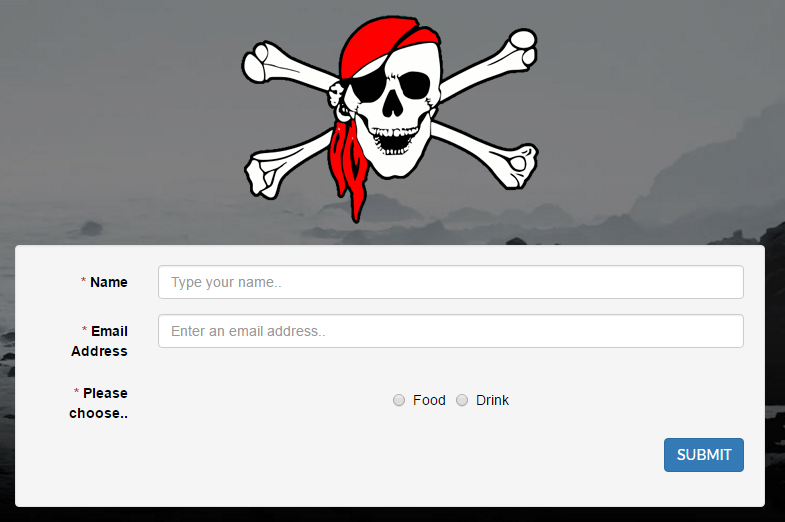
A super easy Bootstrap ready HTML form generator for PHP
<br />
A super easy Bootstrap ready HTML form generator for PHP
v1.1.0 Now has 'Dynamic Form' functionality. You can add child forms to fields like radio buttons, and have the form
appear on selecting the trigger value. See the Dynamic Form section of this readme.
Installation
Install via composer
composer require delboy1978uk/form
Usage
Firstly, "use" all the classes you'll need for your form. Then create your form and fields.
<?php

use Del\Form\Form;
use Del\Form\Field\Text;
use Del\Form\Field\CheckBox;
use Del\Form\Field\Submit;

// Create a form
$form = new Form('registration');

// Create a username, email, spamlist checkbox, and submit button.
$userName = new Text('username');
$email = new Text('email');
$spamMe = new CheckBox('spam');
$submit = new Submit('submit');

// Set labels
$userName->setLabel('User Name');
$email->setLabel('Email Address');
$spamMe->setLabel('Join our (and 3rd parties) email list(s)');

// Add the fields to the form
$form->addField($userName)
      ->addField($email)
      ->addField($spamMe)
      ->addField($submit);

// Render the form
echo $form->render();
Creating Custom Forms
Of course, it's nicer to create your own form than build one up every time, so just create a class and extend
Del\Form\AbstractForm and add your fields in the init() function:
<?php
namespace My\Cool;

use Del\Form\AbstractForm;
use Del\Form\Field\Text\EmailAddress;
use Del\Form\Field\Text\Password;
use Del\Form\Field\Submit;

class LoginForm extends AbstractForm
{
    public function init()
    {
        $email = new EmailAddress('email');
        $password = new Password('passord');
        $submit = new Submit('submit');
        $this->addField($email);
        $this->addField($password);
        $this->addField($submit);
    }
}
Then using your form is as simple as:
<?php
use My\Cool\LoginForm;

$form = new LoginForm('login');
$form->render();
Fitering and validating input
For filtering input, add a Del\Form\Filter\Interface to your field object. For validating the filtered input, add a
Del\Form\Validator\ValidatorInterface. Currently there is an adapter for Zend\Filter and Zend\Validate, but feel free to
write an adapter for you favourite library. Setting a required field adds a Del\Form\Validator\NotEmpty validator.
<?php

// A text field, and an adapter for the filters and the validators
use Del\Form\Field\Text;
use Del\Form\Filter\Adapter\FilterAdapterZf;
use Del\Form\Validator\Adapter\ValidatorAdapterZf;

// Some sensible default string filters for username/email fields
use Zend\Filter\StripTags;
use Zend\Filter\StringTrim;
use Zend\Filter\StringToLower;

// Validation rules
use Zend\Validator\CreditCard;;

// Create the field
$creditCard = new Text('credit-card');

// Create the filters
$stripTags = new FilterAdapterZf(new StripTags());
$trim = new FilterAdapterZf(new StringTrim());
$lowerCase = new FilterAdapterZf(new StringToLower());

// Create the validators
$emailAddress = new ValidatorAdapterZf(new CreditCard());

// Add them to the field
$creditCard->addFilter($stripTags)
      ->addFilter($trim)
      ->addFilter($lowerCase)
      ->addValidator($emailAddress);
Setting and getting values
Del\Form\FormInterface has a populate method which takes an array (usually the post data, but not necessarily ;-).
<?php
if (isset($_POST['submit'])) { // or ask your request object ;-)
    $data = $_POST;
    $form->populate($data);
    if ($form->isValid()) {
        $filteredData = $form->getValues();
    }
}
After populate has been called, if you call Form::render(), it will display any validation error messages.
Field Types
Text
Del\Form\Field\Text fields are the most basic field, and come with a built in StripTags and StringTrim filter.
Del\Form\Field\Text\EmailAddress extends Text, and adds an EmailAddress validator for convenience.
Del\Form\Field\Text\Password is a password field which also extends Text.
<?php
use Del\Form\Field\Text;

$text = new Text('text');
$text->setLabel('Needed Details');
$text->setRequired(true);
$text->setPlaceholder('type some text..');
$text->setValue('Blah');
TextArea
Del\Form\Field\TextArea fields are pretty much the same as the Text field
<?php
use Del\Form\Field\TextArea;

$textArea = new TextArea('message');;
Select
Del\Form|Field\Select needs initialised with setOptions():
<?php
use Del\Form\Field\Select;

$select = new Select('choose');
$select->setOptions([
    'BK' => 'Burger King',
    'McD' => 'McDonalds',
    'Q' => 'Quick',
]);
Radio
Del\Form|Field\Radio can be rendered inline (side by side) or not, also needs initialised with setOptions():
<?php
use Del\Form\Field\Radio;

$radio = new Radio('choose');
$radio->setRenderInline(true);
$radio->setOptions([
    'BK' => 'Burger King',
    'McD' => 'McDonalds',
    'Q' => 'Quick',
]);
Checkbox
Del\Form|Field\Checkbox can be rendered inline or not, also needs initialised with setOptions():
<?php
use Del\Form\Field\CheckBox;

$check = new CheckBox('choose');
$check->setOptions([
    'BK' => 'Burger King',
    'McD' => 'McDonalds',
    'Q' => 'Quick',
]);
FileUpload
Del\Form|Field\FileUpload fields come with a nifty looking Bootstrap compatible renderer, but it uses some javascript.
If you don't want that, just call setRenderer() and pass it a default TextRender class instance.
<?php
use Del\Form\Field\FileUpload;

$fileUpload = new FileUpload('photo');
$fileUpload->setUploadDirectory('/path/to/destination');
Submit
Del\Form|Field\Submit doesn't really need much:
<?php
use Del\Form\Field\Submit;

$submit = new Submit('submit');
$submit->setValue('Send');
Dynamic Forms
You can have for example a radio button with two choices, and each choice can have a separate form relevant to the
checked value. For instance, a radio with a choice of food or drink could then display a dynamic form upon clicking the
drink option, and the drinks form will display.
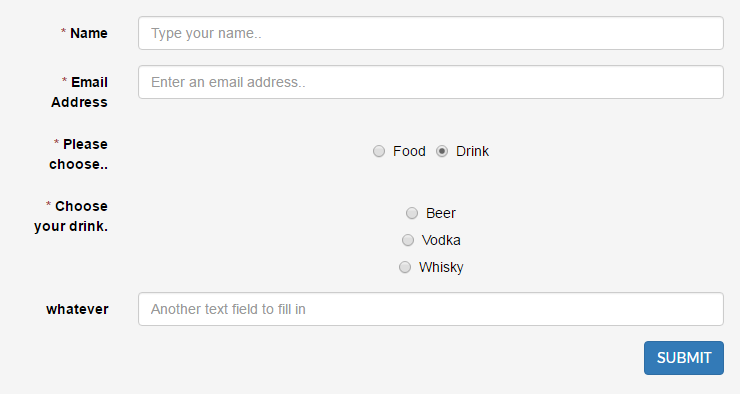
<?php

$radio = new Radio('choice');
$radio->setLabel('Please choose..');
$radio->setRenderInline(true);
$radio->setRequired(true);
$radio->setOptions([
    1 => 'Food',
    2 => 'Drink',
]);

$foodForm = new Form('food');  // This form appears when radio choice 1 is selected
$foodRadio = new Radio('foodchoice');
$foodRadio->setLabel('Choose your food.');
$foodRadio->setRequired(true);
$foodRadio->setOptions([
    1 => 'Cheeseburger',
    2 => 'Pizza',
    3 => 'Steak',
]);
$foodForm->addField($foodRadio);
$radio->addDynamicForm($foodForm, 1);

$drinkForm = new Form('drink');  // This form appears when radio choice 2 is selected
$drinkRadio = new Radio('drinkchoice');
$drinkRadio->setRequired(true);
$drinkRadio->setLabel('Choose your drink.');
$drinkRadio->setOptions([
    1 => 'Beer',
    2 => 'Vodka',
    3 => 'Whisky',
]);
$moreText = new Text('moretext');
$moreText->setLabel('whatever');
$moreText->setPlaceholder('Another text field to fill in');
$drinkForm->addField($drinkRadio);
$drinkForm->addField($moreText);
$radio->addDynamicForm($drinkForm, 2);

